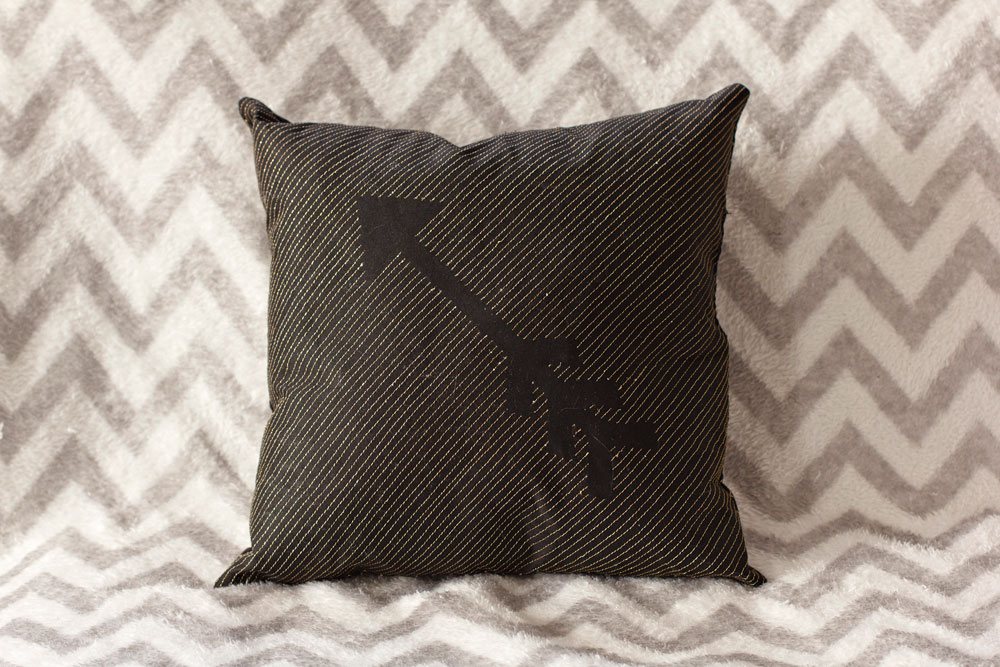
I have a thing for throw pillows. In fact, I have a Pinterest board dedicated just to throw pillows. However, this love isn't reflected in my house, because whenever I see one, I always think: I could make that. Then I never do.
However, I got this idea for a pillow and just had to try it. The idea came to me at night when I couldn't sleep, which is when I get a lot of my craft ideas. Insomnia, at least you're good for something.
It's a negative image pillow. The concept is pretty simple to execute; it just takes a lot of patience and some time at your machine. I did my two pillows in black with gold thread, but they would be equally lovely in any two high-contrast colors.
Step 1: Prepare materials
I printed my pattern on some leftover packing paper. You can also print on tracing paper. Basically, you just want a simple guide on easy-to-remove paper, because you'll sew right over it. The first time I tried this, I just drew a basic shape by hand. You want your monogram in the middle and stripes diagonally across the paper.
You'll also want to adhere some interfacing to the back of your fabric. This will stabilize it and keep it from warping as you sew.
Step 2: Pin and sew
Pin your paper to the front of your interfaced fabric. Line the paper up and center it, but it doesn't need to go all the way to the edge of the fabric.
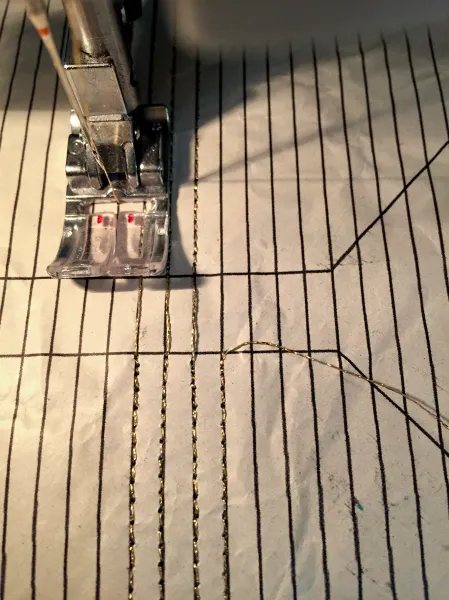
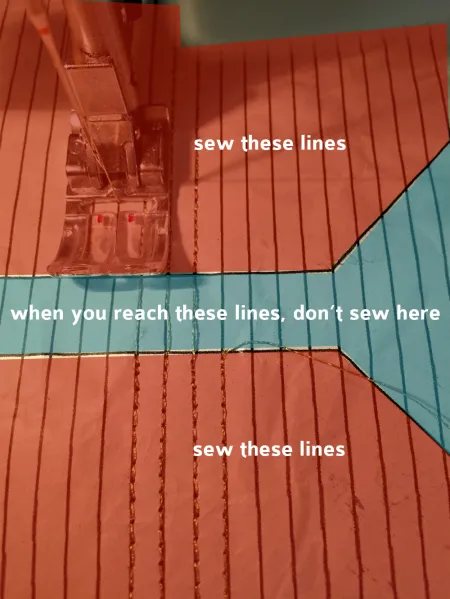
Start sewing from the center. Line up your needle where the outline of the letter and the stripe intersect and sew out toward the edge. Turn once you get to the edge and sew back toward the middle, stopping when you hit the place where the line and the edge of the letter intersect. Then lift past the letter, pulling the thread with you, and continue sewing the line, leaving a break where the letter and line intersect.
Basically, sew the lines, but skip inside the letter.
Step 3: Keep sewing
Finish sewing the lines, leaving the letter as a negative image. Once you're no longer interrupting the lines with spaces, it's easier to take off the paper and use your machine's sewing foot to measure the spacing between lines.
Step 4: Trim and remove the paper
Trim all the loose threads on the front left by the negative space. Remove the paper.
Step 5: Sew it into a pillow
Using your preferred method, sew it into a throw pillow. Then go admire it on the couch. You earned that.
Originally published on my craft blog, Creative Irony, in December 2015.